How to create territories when planning a route – User Guide
How to create territories when planning a route
There are 2 ways to create territories, both require your address list to be in excel:
1. When territories are known.
2. When you don’t know the territories.
Learn how to create territories:
- When territories are known
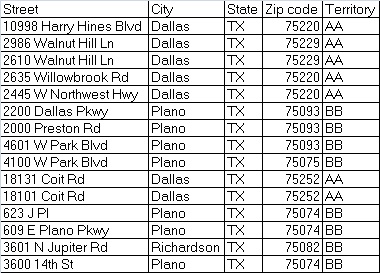
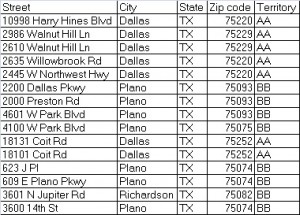
- Have your entire customers’ list in one excel file.
- Add a column named “Territory”.
- Review the addresses and choose a value that represents their territory.
In this example we divided Dallas demo route to 2 territories and named the first AA and the second BB
(your list doesn’t have to be sorted by territories, they can be mixed).
- To each territory, choose the same value (alpha/numeric value).
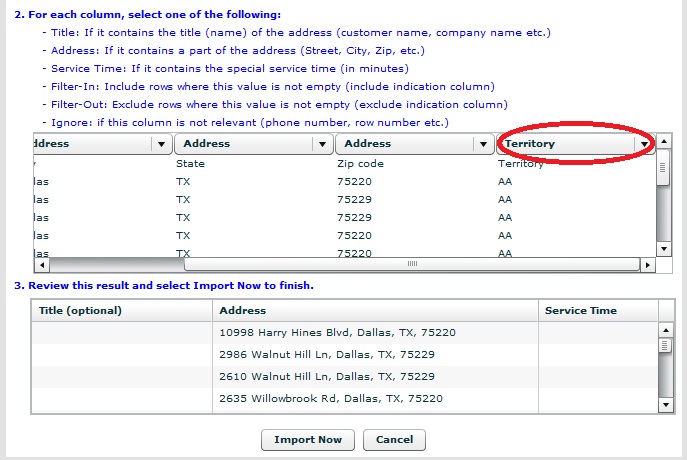
- Import the file into the planner. If you named your new column “territory” the planner will automatically
recognize it, but you can choose a different name and change the header to territory (inside the wizard).
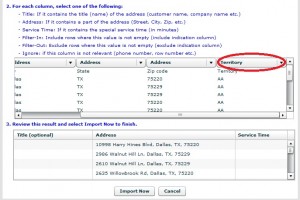
- Review your result and click import now.
- Click Plan My Route and our planner will optimize your list according to the territories you’ve set.
All addresses within the same territory will be allocated one after the other.
The route continues to the next territory only when all addresses in the same territory were allocated.
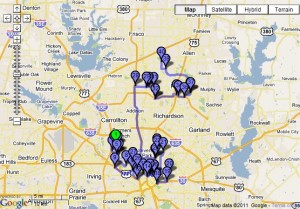
- When you don’t know the territories
- Enter your list of addresses.
- Click Plan My Route. Now that you see your route on the map, you can choose which addresses belong to each territory.
In this example we will have two territories, one that includes the addresses at the bottom and one that includes those at the top.
- Export your route to excel.
- Add a column for territories.
- Review the addresses and choose a value that represents their territory.
(according to the route and map you just got). - Import the file into the planner and follow steps 5-7 above, in part 1.
You can see your addresses on the map without planning your route but after you plan it, you’ll see the address order and it will be much easier to see which is the address that “draws the line” between the territories.